
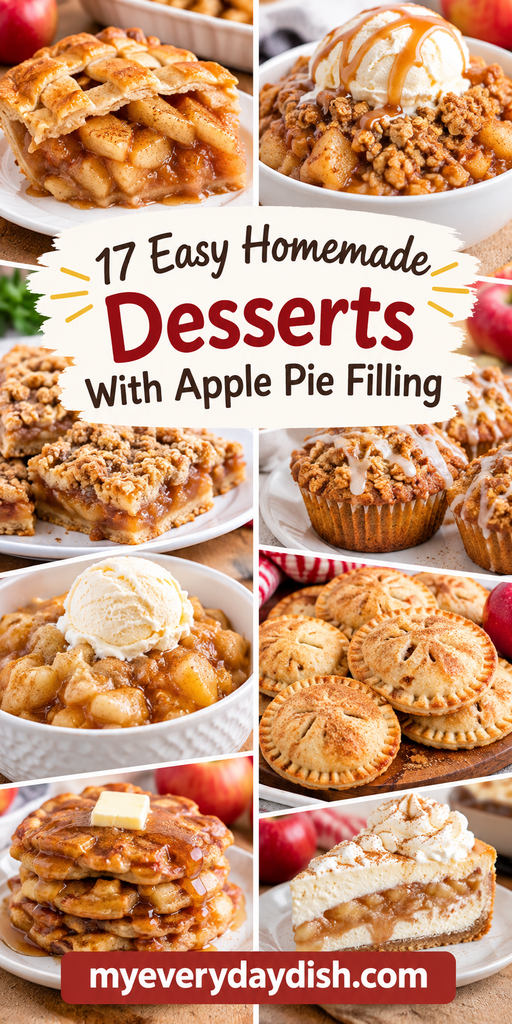
You don’t need to make apple pie from scratch to enjoy a warm, homemade dessert. With canned or homemade apple pie filling and a few common ingredients, you can create everything from golden cakes and crisp toppings to flaky pastries, cheesecake treats, and no-bake desserts.
This collection features 17 step-by-step recipes for quick weeknight treats, holiday desserts, and make-ahead sweets.
Each recipe includes clear baking temperatures, timing guidance, texture cues, and serving ideas, so you’ll know when the filling is bubbling, the topping is golden, or the dessert is ready to chill. Start with these easy apple pie filling desserts.
Easy Homemade Desserts With Apple Pie Filling
These six baked desserts turn apple pie filling into warm, comforting treats with minimal prep. Use one 20- to 21-ounce can of apple pie filling, or about 2 cups of homemade filling, unless a recipe says otherwise. Most are ready when the filling bubbles and the topping turns golden.
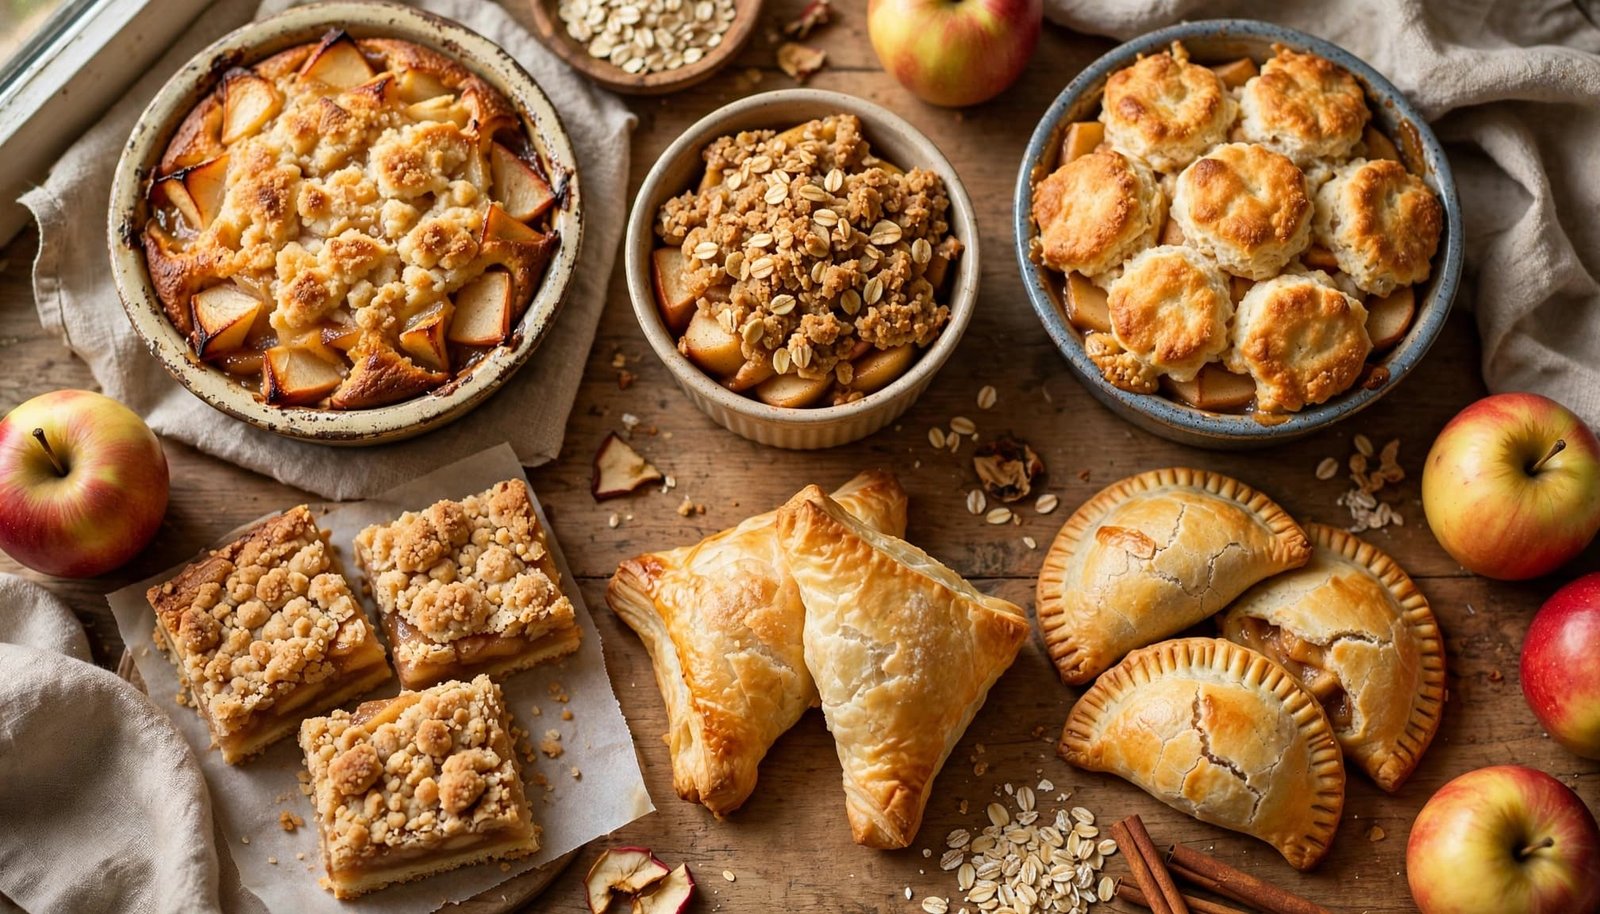
1. Apple Pie Filling Dump Cake
This easy dump cake needs no mixing bowl for the cake layer. Use two 20- to 21-ounce cans of apple pie filling for a generous 9×13-inch dessert.
Ingredients
- 2 cans apple pie filling, 20 to 21 ounces each
- 1 teaspoon cinnamon or apple pie spice
- 1 box yellow or spice cake mix, 15.25 ounces
- 3/4 cup melted butter, or thin slices of cold butter
- Heat the oven to 350°F and grease a 9×13-inch baking pan.
- Spread the apple pie filling evenly in the pan, then sprinkle it with cinnamon or apple pie spice.
- Sprinkle the dry cake mix over the apples. Don’t stir the layers together.
- Pour the melted butter evenly over the cake mix, or cover the surface with thin butter slices.
- Bake for 40 to 50 minutes, until golden and bubbling. Dry white patches mean the butter didn’t spread evenly.
- Cool for 10 to 15 minutes. Serve with vanilla ice cream or caramel sauce.
Read also: Easy Slow Cooker Italian Penicillin Soup Recipe
2. Oat-Topped Apple Pie Filling Crisp
A crisp gives you a buttery, crumbly topping without the work of making pastry. Chopped pecans or walnuts add extra crunch.
Ingredients
- 1 can apple pie filling, 20 to 21 ounces
- 1/2 teaspoon cinnamon
- 1/2 cup rolled oats
- 1/3 cup all-purpose flour
- 1/3 cup packed brown sugar
- 1/4 teaspoon salt
- 5 tablespoons cold butter, cubed
- 1/3 cup chopped pecans or walnuts, optional
- Heat the oven to 350°F and grease a 9×9-inch baking dish.
- Spread the apple pie filling in the dish and sprinkle it with cinnamon.
- Mix the oats, flour, brown sugar, salt, and nuts in a bowl.
- Cut in the cold butter until the mixture forms coarse crumbs.
- Scatter the topping over the apples.
- Bake for 30 to 35 minutes, until the edges bubble and the topping is deep golden brown. Serve warm with whipped cream or ice cream.
3. Easy Apple Pie Filling Cobbler
This cobbler has a soft, cake-like topping that rises over the fruit. Leave a few spaces between spoonfuls so the apples can peek through as they bake.
Ingredients
- 1 can apple pie filling, 20 to 21 ounces
- 1 cup all-purpose flour
- 1 teaspoon baking powder
- 1/3 cup sugar
- 1/2 cup milk
- 4 tablespoons melted butter
- 1/2 teaspoon cinnamon
- Heat the oven to 350°F and grease an 8×8-inch or 9×9-inch baking dish.
- Spread the apple pie filling across the bottom.
- Whisk the flour, baking powder, sugar, milk, melted butter, and cinnamon until smooth.
- Spoon the batter over the apples without covering every spot completely.
- Bake for 35 to 45 minutes, until the topping is puffed and golden and the fruit bubbles around the edges.
- Serve warm with vanilla ice cream or a quick glaze made from powdered sugar and a little milk.
Read also: 30 Cozy Pumpkin Dessert Recipes for Fall
4. Apple Pie Filling Crumble Bars
These bars combine a press-in oat crust with a crumbly topping. Cooling time matters because the apple layer needs to set before slicing.
Ingredients
- 1 cup all-purpose flour
- 1/2 cup rolled oats
- 1/2 cup brown sugar
- 1/2 cup melted butter
- 1/4 teaspoon salt
- 1 can apple pie filling, 20 to 21 ounces
- Heat the oven to 350°F and line an 8×8-inch pan with parchment paper.
- Mix the flour, oats, brown sugar, melted butter, and salt until crumbly.
- Reserve about 1 cup of the mixture, then press the rest firmly into the pan.
- Spread the apple pie filling over the crust.
- Crumble the reserved mixture over the apples.
- Bake for 35 to 40 minutes, until browned. Cool completely before cutting, then add powdered sugar glaze or caramel if desired.
5. Puff Pastry Apple Turnovers
Frozen puff pastry creates flaky turnovers in a fraction of the time required for homemade dough. Chop large apple pieces into smaller bites so the pastries seal neatly.
Ingredients
- 1 package thawed puff pastry sheets
- 1 can apple pie filling, 20 to 21 ounces
- 1 egg, beaten with 1 tablespoon water
- Coarse sugar, optional
- 1/2 cup powdered sugar mixed with 1 tablespoon milk
- Heat the oven to 400°F and line a baking sheet with parchment paper.
- Cut each pastry sheet into squares.
- Place a small spoonful of filling in the center of each square.
- Fold the pastry into triangles, press the edges together, and crimp them with a fork.
- Cut a small vent in each turnover, brush with egg wash, and sprinkle with coarse sugar.
- Bake for 18 to 22 minutes, until puffed and golden. Cool slightly, then drizzle with icing.
6. Cinnamon Apple Hand Pies
Hand pies are easy to serve and travel well for picnics, bake sales, or lunchbox treats. Keep a clear border around the filling to prevent leaks.
Ingredients
- 1 package refrigerated pie crusts or homemade pie dough
- 1 can apple pie filling, 20 to 21 ounces
- 1/2 teaspoon cinnamon
- 1 egg, beaten with 1 tablespoon water
- Powdered sugar or cinnamon glaze, for serving
- Heat the oven to 375°F and line a baking sheet with parchment paper.
- Roll and cut the dough into equal circles or rectangles.
- Place a small amount of apple filling mixed with cinnamon in the center of each piece.
- Leave a border around the filling, fold the dough over, and press the edges with a fork.
- Cut two small vents on top, then brush each pie with egg wash.
- Bake for 20 to 25 minutes, until golden brown. Cool before dusting with powdered sugar or adding cinnamon glaze.
Quick Apple Pie Filling Desserts for Cakes, Rolls, and Pastries
Apple pie filling works well beyond traditional crusts. Layer it into batter, roll it inside dough, or spoon it over bread for quick desserts with tender apples and warm spice. Drain a little excess syrup before filling pastries, since too much liquid can make the dough soggy.
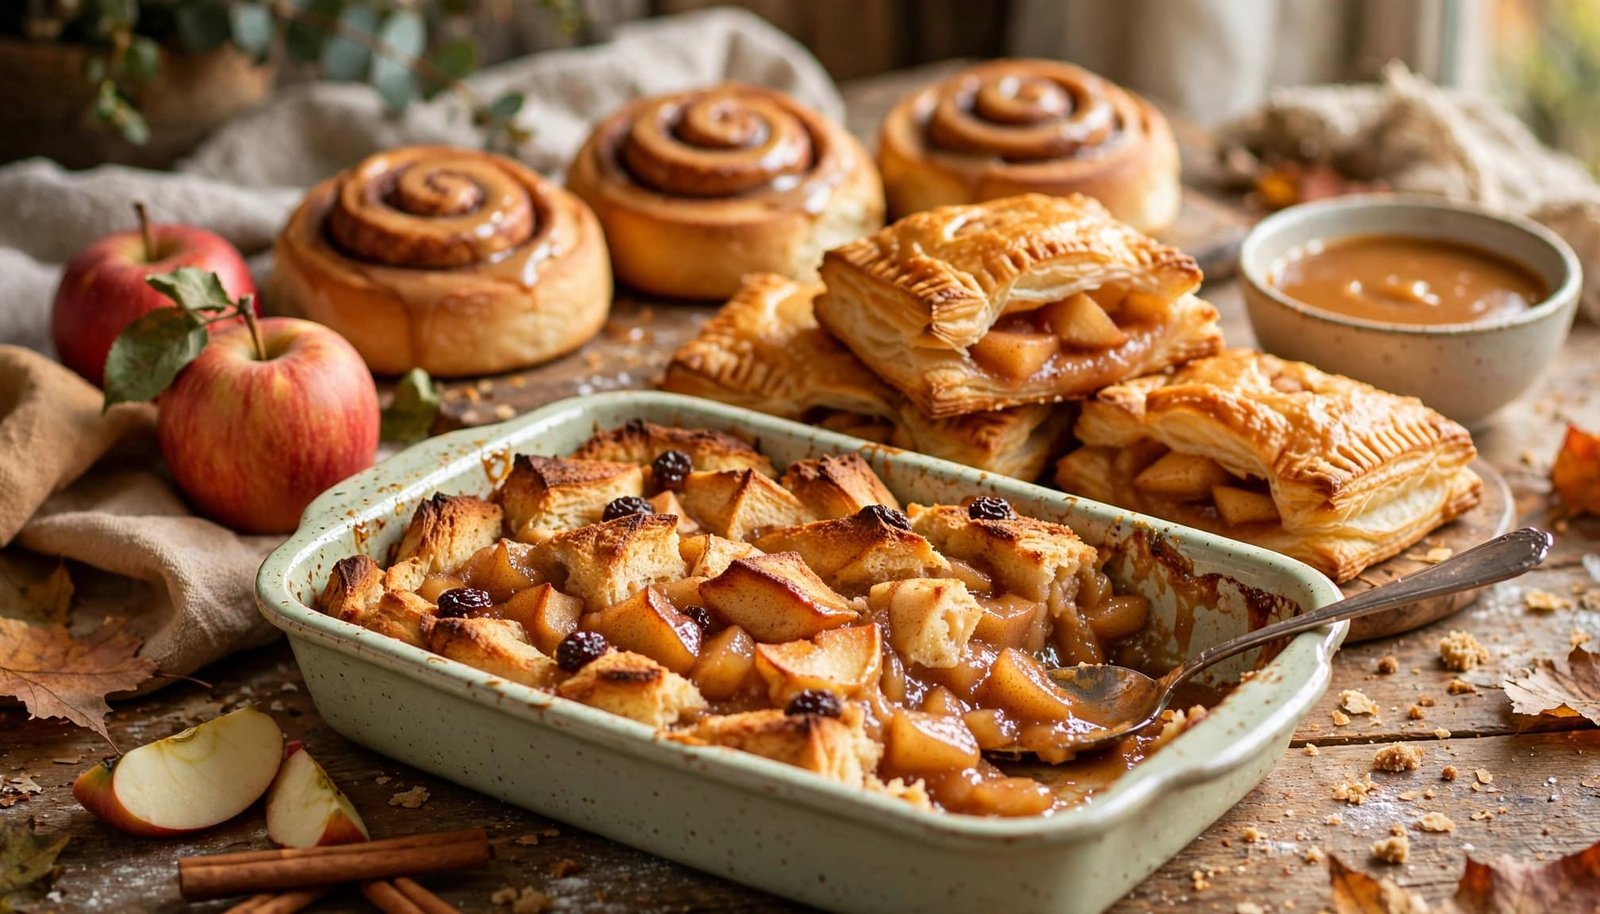
7. Apple Pie Filling Cinnamon Rolls
Refrigerated cinnamon roll dough turns into a soft, fruit-filled breakfast dessert with very little prep. Use the included icing or stir powdered sugar with a small amount of milk for a homemade glaze.
- Heat the oven to the temperature listed on the dough package, usually 350°F. Grease a round or square baking dish.
- Unroll the dough carefully and separate the rolls if needed. Chop any large apple pieces into smaller bites.
- Spread a thin layer of apple pie filling over the dough, leaving a small border around the edges.
- Roll the dough back up tightly, then cut it into even portions with a sharp knife.
- Arrange the rolls cut-side up in the greased dish. Bake until puffed and golden, usually 20 to 25 minutes. The center roll should spring back lightly when pressed.
- Let the rolls cool for several minutes, then drizzle with icing while warm, not piping hot.
8. Apple Pie Filling Puff Pastry Braid
This pastry looks special but uses one sheet of thawed puff pastry. A small amount of filling keeps the layers crisp instead of soggy.
- Heat the oven to 400°F and place the pastry on a parchment-lined baking sheet.
- Spread a thin layer of softened cream cheese or butter down the center, if desired.
- Cut angled strips along both sides of the pastry, stopping before the center filling area.
- Spoon a narrow line of slightly drained apple pie filling down the middle.
- Cross the pastry strips over the apples, alternating sides to form a braid. Brush the top with beaten egg.
- Bake for 20 to 25 minutes, until puffed and deep golden brown. Cool for at least 15 minutes before slicing, then drizzle with powdered sugar glaze.
9. Apple Pie Filling Bread Pudding
Day-old brioche, challah, or French bread absorbs the custard well without turning mushy. The finished pudding should look puffed, with firm edges and a center that jiggles slightly.
- Heat the oven to 350°F and grease a baking dish.
- Layer cubed bread and apple pie filling in the dish, finishing with a layer of bread.
- Whisk eggs, milk, vanilla, cinnamon, and brown sugar in a bowl.
- Pour the custard evenly over the bread. Press the cubes gently into the liquid, then rest the dish for 10 minutes.
- Bake for 40 to 50 minutes, until puffed and set in the center.
- Serve warm with powdered sugar glaze or warm caramel sauce. For a more exact doneness check, the center should reach about 160°F to 165°F.
10. Apple Pie Filling Cake Roll
A thin vanilla sponge or boxed cake mix makes this rolled dessert simple. Drain and chop the filling so the apples stay in a neat line instead of tearing the cake.
- Heat the oven to 350°F. Line a jelly roll pan with parchment and prepare the cake batter.
- Spread the batter evenly in the pan and bake until the top springs back lightly.
- Turn the hot cake onto a clean kitchen towel dusted with powdered sugar. Peel away the parchment.
- Roll the cake and towel together from one short end. Let it cool completely.
- Unroll the cake, spread on whipped cream or cream cheese frosting, and add a narrow line of chopped apple filling.
- Roll it again without the towel. Chill before slicing, then dust with powdered sugar.
11. Apple Pie Filling Crescent Ring
A crescent ring gives you flaky dough, spiced apples, and a simple glaze in one shareable dessert. Keep the filling near the wide ends so it stays contained.
- Heat the oven to 375°F and arrange crescent triangles in a ring on a baking sheet, with the wide ends facing inward.
- Spread softened cream cheese across the center ring, if desired.
- Spoon apple pie filling near the wide ends, leaving the pointed tips mostly clear.
- Fold each point over the filling and tuck it beneath the inner edge.
- Brush the dough with egg wash. Bake for 20 to 25 minutes, until golden brown and cooked through.
- Cool slightly, then drizzle with powdered sugar mixed with milk. Filling placed too close to the points can leak during baking.
12. Skillet Apple Pie Filling Biscuits
This warm dessert combines bubbling apples with golden biscuit dough. Use a cast-iron skillet or round baking dish, and serve it directly from the pan.
- Heat the oven to 375°F. Warm the apple pie filling with cinnamon in a greased skillet until hot.
- Cut refrigerated biscuit dough into smaller pieces and arrange them over the apples.
- Brush the biscuits with melted butter, then sprinkle them with cinnamon and brown sugar.
- Bake for 20 to 25 minutes, until the biscuits are golden and cooked through.
- Look for hot filling bubbling around the biscuit pieces before removing the skillet.
- Spoon the dessert into bowls and serve with vanilla ice cream.
Make-Ahead and No-Fuss Apple Pie Filling Treats
These final apple pie filling desserts fit busy weekends, potlucks, brunches, and casual parties. Choose a chilled option when you want to work ahead, or serve one of the warm desserts straight from the oven or skillet.
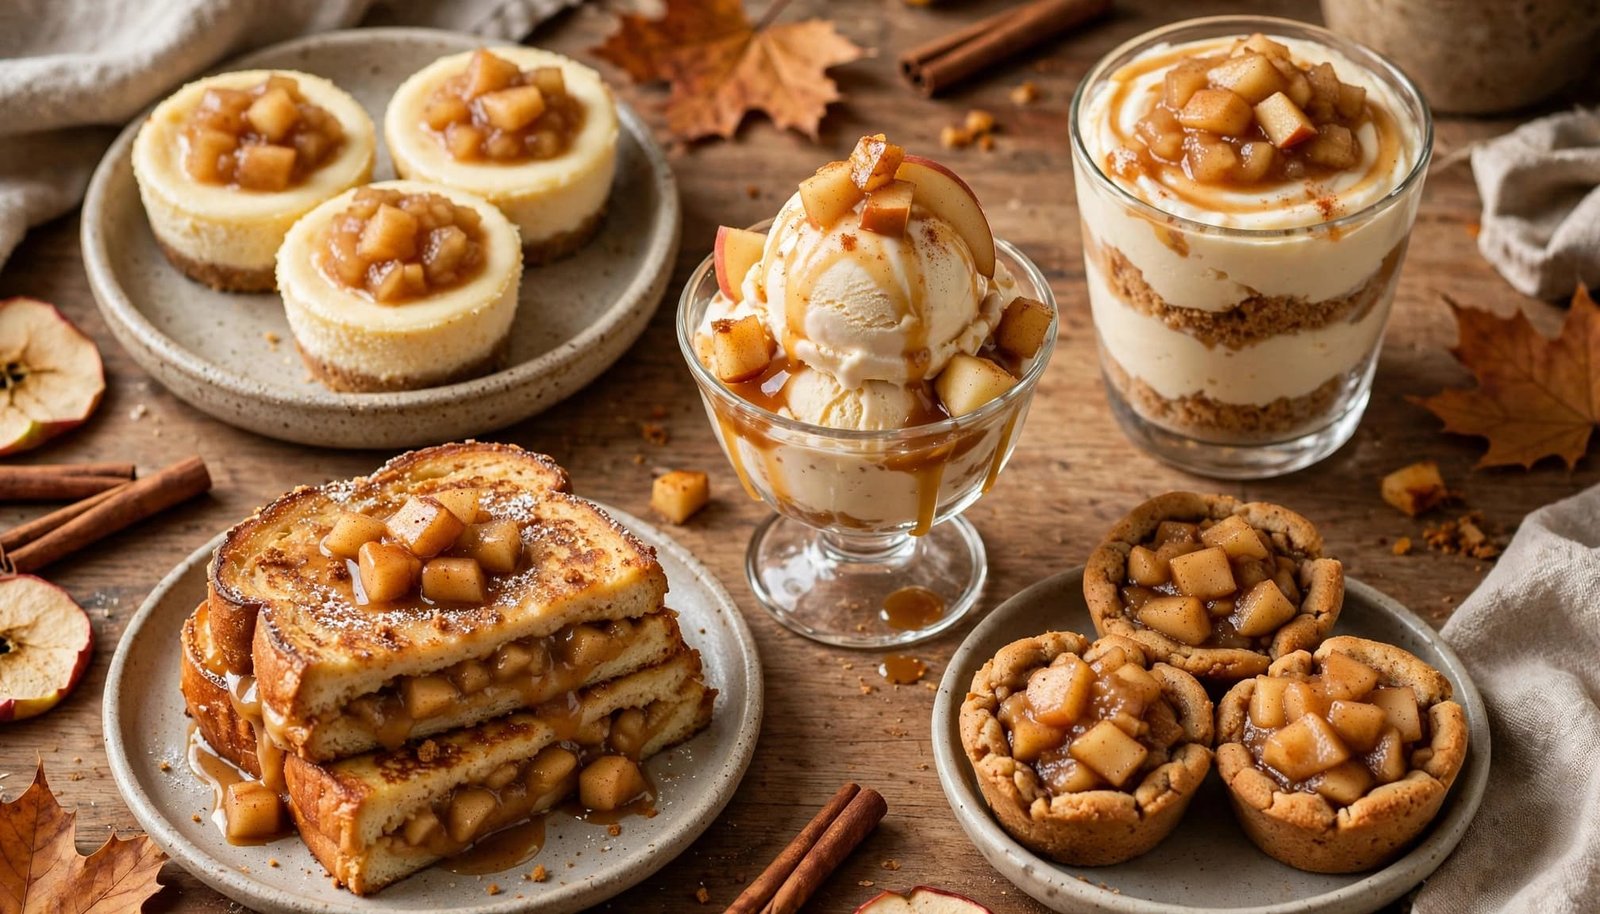
13. Mini Apple Pie Cheesecake Cups
These small cheesecake cups are easy to portion for parties. The crumb crust and apple topping give each one the flavor of apple pie without rolling pastry.
Ingredients
- 1 cup vanilla wafer or graham cracker crumbs
- 3 tablespoons melted butter
- 8 ounces softened cream cheese
- 1/4 cup sugar
- 1 teaspoon vanilla
- 1 large egg
- 1/2 cup apple pie filling, chopped if the pieces are large
- Cinnamon whipped cream, for serving
- Heat the oven to 325°F and line a 12-cup muffin pan with paper liners.
- Mix the crumbs and melted butter. Press the mixture firmly into the liners.
- Beat the cream cheese, sugar, vanilla, and egg until smooth.
- Spoon the cheesecake mixture over the crusts, then add a small amount of apple filling to each cup.
- Bake for 18 to 22 minutes. The centers should look set but still have a slight wobble when removed from the oven.
- Cool at room temperature, then refrigerate until firm. Add cinnamon whipped cream just before serving.
Keep the cheesecake cups refrigerated and serve them within three to four days. Perishable desserts should be chilled within two hours, or within one hour when temperatures exceed 90°F, according to USDA leftovers guidance.
14. No-Bake Apple Cheesecake Parfaits
No-bake apple cheesecake parfaits are ideal for make-ahead entertaining because you can assemble them in small glasses several hours before guests arrive. Keep them cold until serving.
Ingredients
- 8 ounces softened cream cheese
- 1/2 cup powdered sugar
- 1 teaspoon vanilla
- 1 1/2 cups whipped topping or whipped cream
- 1 cup graham cracker crumbs
- 1 cup cooled apple pie filling
- Cinnamon, caramel sauce, or toasted chopped pecans, optional
- Beat the cream cheese, powdered sugar, and vanilla until smooth.
- Fold in the whipped topping or whipped cream until no streaks remain.
- Layer graham cracker crumbs, cheesecake filling, and cooled apples in small glasses.
- Repeat the layers, finishing with apples or whipped cream.
- Add cinnamon, caramel sauce, or toasted pecans if desired.
- Cover and chill for at least two hours before serving.
Store the parfaits in the refrigerator, covered, for up to two days. The crumbs soften over time, so add toppings shortly before serving.
15. Apple Pie Filling Ice Cream Sundae Cups
Warm apple pie filling turns plain vanilla ice cream into a fast dessert for unexpected guests. The apples should be warm, not boiling, so the ice cream softens without melting too quickly.
Ingredients
- 1 cup apple pie filling
- Vanilla ice cream
- Crushed cookies or graham crackers
- Whipped cream
- Caramel sauce
- Toasted nuts or cinnamon, optional
- Warm the apple pie filling gently in a small saucepan over low heat.
- Add crushed cookies or graham crackers to cups or bowls.
- Layer in vanilla ice cream, then spoon the warm apples over the top.
- Finish with whipped cream and caramel sauce.
- Sprinkle with toasted nuts or cinnamon, if desired.
Assemble these sundaes just before serving. Store leftover filling in the refrigerator and reheat it gently rather than boiling it.
16. Apple Pie Filling Stuffed French Toast
Stuffed French toast works for breakfast-style sweets, brunches, and dessert-for-dinner occasions. Use just enough filling to keep the bread sealed.
Ingredients
- 8 thick slices of bread
- 1 cup apple pie filling
- Cream cheese or cinnamon butter
- 2 large eggs
- 1/2 cup milk
- 1 teaspoon vanilla
- 1/2 teaspoon cinnamon
- Butter, for the skillet
- Powdered sugar, maple syrup, or caramel
- Cut a pocket into each slice of bread without slicing through the sides.
- Spread in cream cheese or cinnamon butter, then add a small amount of apple filling.
- Press the openings closed so the filling stays inside.
- Whisk the eggs, milk, vanilla, and cinnamon. Dip each stuffed slice briefly in the custard.
- Cook in a buttered skillet over medium heat until both sides are golden.
- For a baked version, arrange the assembled slices in a greased dish and bake at 350°F for 25 to 30 minutes.
- Serve with powdered sugar, maple syrup, or caramel.
Serve this French toast warm. Refrigerate leftovers in a covered container and reheat them in the oven or skillet.
17. Apple Pie Filling Cookie Cups
Cookie cups provide a crisp, hand-held base for spiced apples. Fill them shortly before serving so the cookie stays firm.
Ingredients
- Refrigerated or homemade sugar cookie dough
- Apple pie filling, chopped
- Cinnamon
- Whipped cream or caramel, optional
- Heat the oven according to the dough recipe, usually 350°F, and grease a muffin pan.
- Press pieces of dough into the muffin cups, forming an even layer up the sides.
- Bake until the edges are golden but the centers remain soft.
- While warm, press the centers down with the back of a spoon to form cups.
- Cool completely, then fill with chopped apple pie filling mixed with cinnamon.
- Bake the filled cups briefly only if the apples need warming. Add whipped cream or caramel before serving.
Store the empty cookie cups in an airtight container at room temperature. Fill them shortly before serving to protect their crisp texture.
Frequently Asked Questions
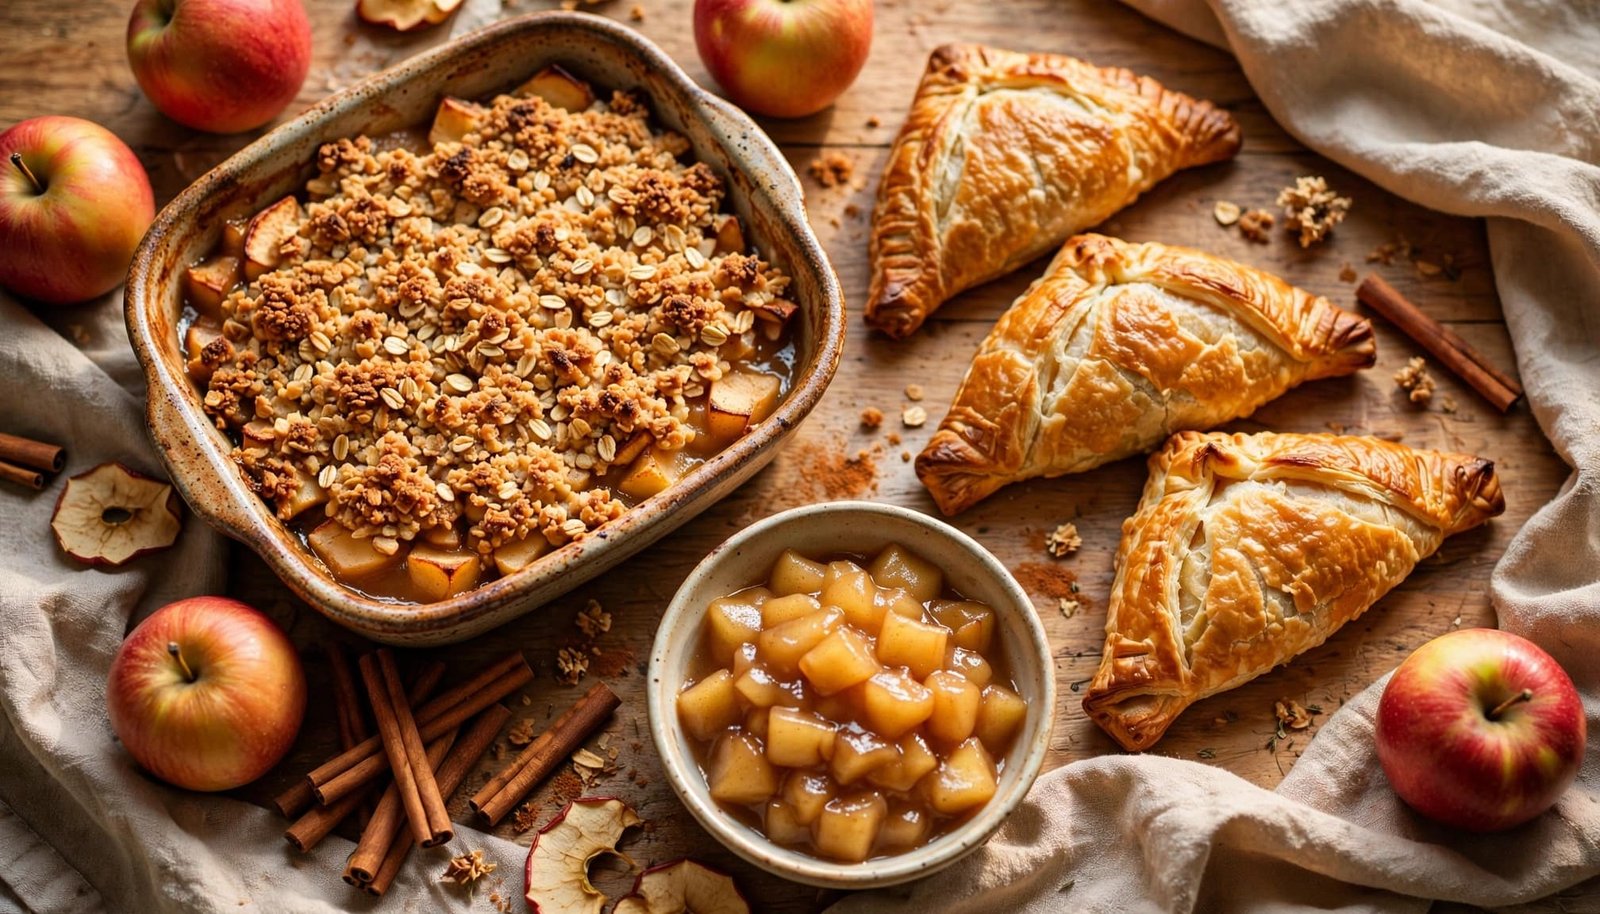
These answers cover the small details that can make apple pie filling desserts turn out better. Use them to adjust sweetness, protect texture, and store leftovers safely.
Can I use homemade apple pie filling instead of canned filling?
Yes, homemade apple pie filling works well in all of these desserts. Cook it until the apples are tender and the juices have thickened, so the filling doesn’t release too much liquid during baking.
As a general guide, use about 2 cups of homemade filling in place of one 20- to 21-ounce can. The exact amount can vary by recipe, especially when you’re filling turnovers, cookie cups, or other pastries that need a smaller portion.
How can I make apple pie filling less sweet?
Choose a homemade filling with less sugar, or stir a little lemon juice into canned filling to balance its sweetness. Add the lemon juice gradually, since too much can overpower the cinnamon and apple flavors.
You can also pair sweet filling with a plain topping, such as unsweetened whipped cream, a simple biscuit topping, or lightly sweetened pastry. Avoid adding much extra liquid, because it can make pastry and crumb toppings soggy.
How do I store desserts made with apple pie filling?
Cover baked cakes, crisps, bars, and pastries, then refrigerate them for several days. Cheesecake cups, parfaits, whipped cream desserts, and other cream-based treats must stay refrigerated because they contain perishable ingredients.
Refrigerate leftovers within two hours and keep them at 40°F or below. For more food-safety details, follow the USDA leftovers guidance. Crisp toppings soften in the refrigerator, but a short reheat in a 350°F oven can restore some of their texture.
Can I freeze these apple desserts?
Baked crisps, dump cakes, turnovers, and hand pies usually freeze well after they cool completely. Wrap each dessert tightly in plastic wrap, then place it in a freezer bag or airtight container to protect it from freezer burn.
Thaw the dessert in the refrigerator before reheating it in the oven. Cream-topped desserts and no-bake cheesecake parfaits are better made fresh because freezing can change the texture of whipped toppings, cream cheese mixtures, and cookie crumbs.
Why is my apple pie filling dessert watery?
Watery filling can come from very juicy apples, too much syrup, underbaking, or slicing the dessert before it has cooled and set. Pastry recipes are especially sensitive to extra liquid, so drain a little syrup from canned filling before adding it to turnovers, braids, or hand pies.
Bake fruit desserts until the edges bubble and the topping is fully browned. Then let cakes, bars, and crisps rest before serving. Cooling gives the thickened juices time to settle instead of running across the plate.
What toppings taste best with apple pie filling desserts?
Vanilla ice cream and whipped cream balance warm spices with a cool, creamy finish. Caramel sauce, powdered sugar glaze, cinnamon sugar, and a little flaky salt also work well with baked apples.
For added crunch, sprinkle on toasted pecans or walnuts, or use an oat crumb topping. Creamy toppings soften the spice and fruit, while nuts and crumbs provide contrast against the tender filling.
Conclusion
One can of apple pie filling can become far more than a traditional pie. For the fastest treats, try a dump cake or ice cream cups, while turnovers, crumble bars, and cheesecake cups make better choices for sharing.
Adjust the spices, toppings, and doughs to match what you have at home. Then enjoy one dessert warm from the oven, or prepare a chilled treat to serve later.
Save the pin for later

I’m the creator of My Everyday Dish, a food blog focused on easy homemade recipes, comforting family meals, simple baking, and seasonal food ideas. I love finding practical ways to make everyday cooking less stressful and more enjoyable. Here, I share recipes with simple ingredients, clear instructions, and plenty of flavor, helping you make delicious meals and treats you’ll feel confident serving at home.
Leave a Reply