

Halloween party food gets more attention when it looks a little creepy, and witch finger foods make that easy. These playful snacks are shaped like crooked fingers, complete with knuckles, edible nails, and sometimes a bright red “blood” effect. They work for appetizers, desserts, kid-friendly treats, and savory bites for adults.
You can turn cookie dough into green fingers with almond nails, shape pizza dough into cheesy breadstick fingers with marinara, or arrange vegetables for a quick no-bake platter. The ideas also include baked treats, savory snacks, simple vegetables, easy-assembly options, and allergy-aware swaps, so you can choose recipes that fit your menu and guests.
A few small details make each finger look realistic, from pressed knuckle lines and sliced pepper nails to ketchup, jam, or tomato sauce for the blood. Start with these 35 easy Halloween witch finger foods, then use the decorating tips to build a platter that guests will want to grab.
Sweet Baked Witch Finger Recipes
Sweet witch finger cookies always get a reaction before anyone takes a bite. At my last Halloween party, guests hovered over the cookie tray, trying to decide whether the crooked almond nails or the jam “blood” looked creepier. These seven versions use simple doughs and small details to create a memorable dessert spread.
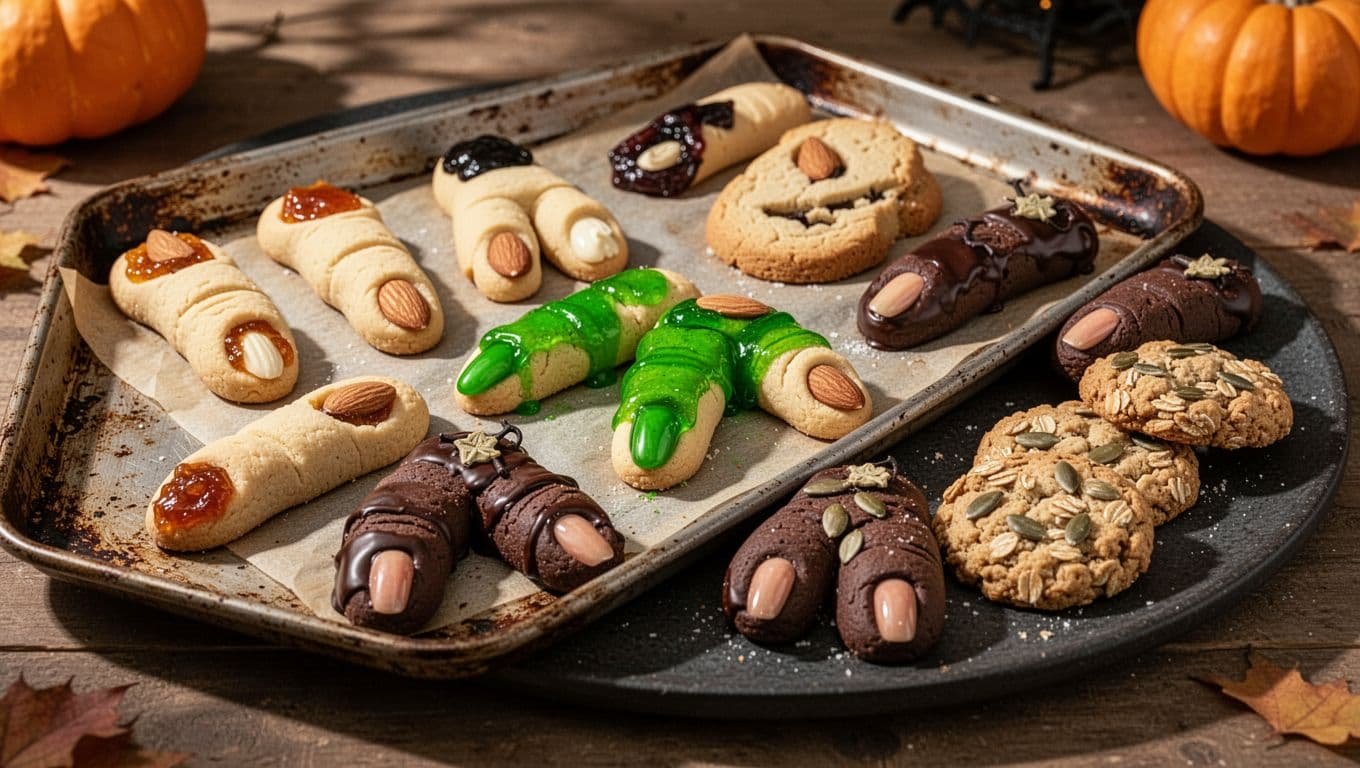
1. Classic Almond Witch Finger Cookies
Shape buttery cookie dough into thin, crooked fingers, then press almond halves into the nail beds. Add strawberry or raspberry jam around each almond for a bloody edge. Score knuckle lines with a knife, then chill the shaped cookies briefly so they hold their form while baking.
2. Green Witch Finger Cookies with Red Gel
Tint the dough with green food coloring for an instantly witchy finish. Press sliced almonds into the tips, then bake as directed. Once the cookies cool, pipe red decorating gel around the nails, or brush on raspberry jam, so the color stays bright and distinct.
3. Shortbread Witch Fingers with Pinched Knuckles
A simple shortbread dough creates tender, buttery fingers with crisp edges. Pinch the dough at each joint, then add short wrinkle lines with a knife. Chill the shaped fingers for at least 30 minutes before baking, which helps preserve the knuckles and prevents excess spreading.
4. Italian-Style Witch Fingers with Jam
Flavor a lightly sweet cookie dough with vanilla or almond extract, then add blanched almonds for neat, pale nails. Use apricot or peach preserves to attach each almond. For a severed-finger effect, dab strawberry preserves onto one end after baking and cooling.
5. Thick Butter Cookie Witch Fingers
Thicker butter cookies are soft, sturdy, and easy for children to shape. Form wider fingers, press in almond nails, and add red jam or green icing after baking. Because these cookies are larger than thin shortbread, give them extra oven time and check the centers before removing them.
6. Chocolate Witch Finger Cookies
Add cocoa powder to your favorite butter cookie dough for dark, rich witch fingers. Use white chocolate pieces, sliced almonds, or pumpkin seeds as the nails. After baking, add a thin line of red icing around each nail for contrast without covering the chocolate flavor.
7. Chewy Oatmeal Witch Finger Cookies
Shape chewy oatmeal cookie dough into short, crooked fingers with uneven edges. Pumpkin seeds, sunflower seeds, and chocolate chips make useful nut-free nail choices. The oats create a rough, craggy texture that looks especially creepy, so keep the shapes rustic instead of smoothing every surface.
Savory Halloween Witch Finger Foods for Party Platters
Savory witch fingers make a party platter feel playful without requiring complicated recipes. At my last Halloween gathering, the garlic pizza fingers disappeared first because guests dipped the golden ends into marinara like they were pulling them from a bubbling cauldron. Arrange these snacks with small bowls of red sauce, mustard, and cheese dip so every creepy bite has a flavorful finish.
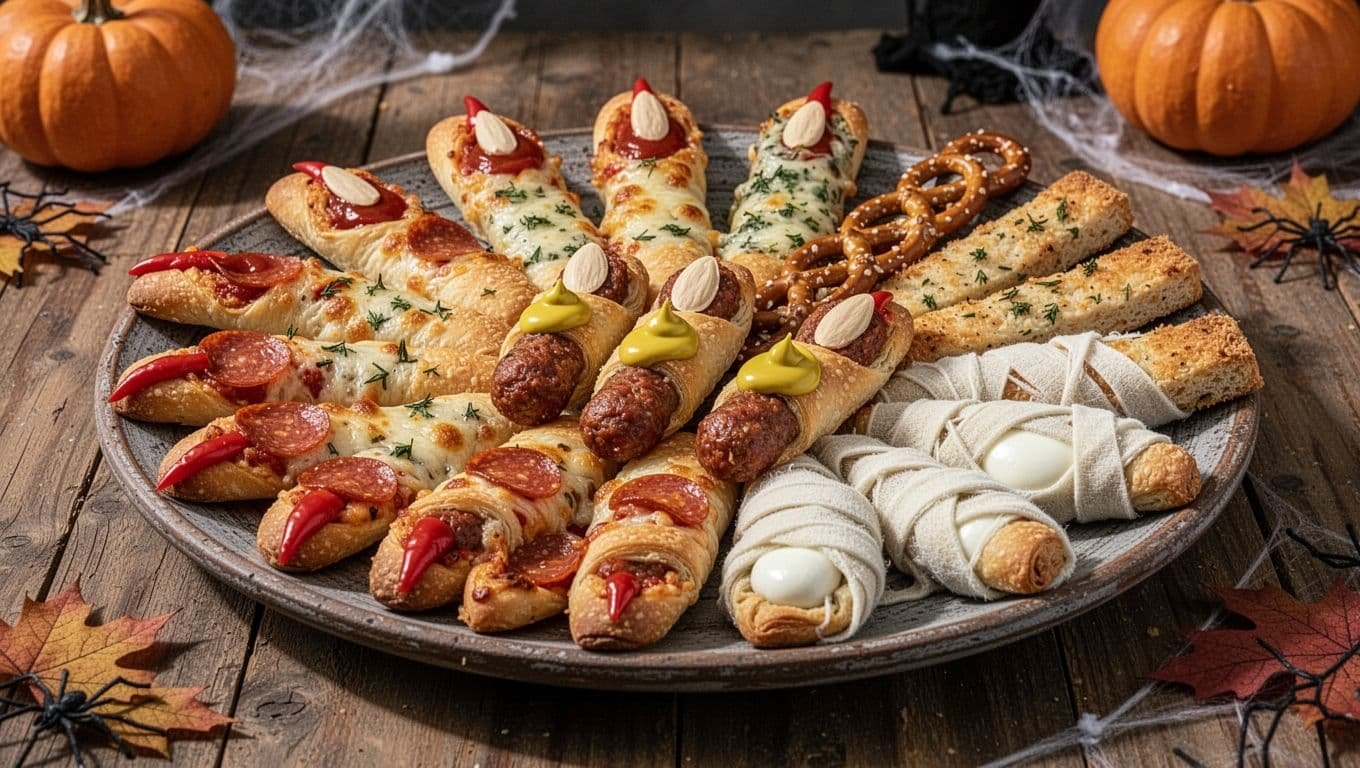
8. Garlic Pizza Dough Witch Fingers
Cut pizza dough into narrow strips and gently roll each one into a short finger shape. Brush the dough with garlic butter, then add shallow knuckle cuts before baking. These small grooves create a more realistic shape without weakening the dough.
Press a thin piece of sweet pepper into the tip for the nail, then bake until the fingers turn golden and feel firm. Serve them warm with pizza sauce as the blood. They taste best fresh from the oven, but you can keep them on a platter briefly while guests serve themselves.
9. Sausage Witch Fingers with Mustard Ooze
Cook sausages or chipolatas fully before decorating. Cut each sausage into finger-sized pieces, then make a small slit at one end. Tuck in an almond sliver or a small piece of red or green pepper to hold the nail in place.
Add thin mustard lines around the joints and spoon tomato sauce over one end for a bloody finish. Because cooked sausage is perishable, serve it hot or keep it at 140°F or above. The USDA food safety basics recommends discarding perishable food left at room temperature for more than two hours.
10. Cheesy Herb Finger Sticks
Use cheese biscuit dough or breadstick dough mixed with shredded cheddar, dried herbs, and a little cornmeal. The cornmeal adds a lightly crisp texture, while cheddar gives the fingers a rich golden color.
Shape the dough into short, uneven fingers and press pepitas or sliced olives into the tips as nails. Add shallow joint marks with a knife, then bake until the edges are crisp. These sticks can sit out longer than meat-filled appetizers, so they’re a useful choice for a grazing platter.
11. Pretzel Witch Fingers with Mustard Blood
Ready-made pretzel dough keeps this appetizer simple, although homemade dough works well too. Roll it into thin fingers, pinch the ends slightly, and brush the surface with egg wash. Sprinkle coarse salt over the top before baking.
Set the finished pretzels beside mustard, ketchup, or spicy cheese dip. Use red sauce as the blood, or let guests choose their own dip. Pretzel fingers are best warm, but they remain enjoyable at room temperature for a short serving window.
12. Pepperoni Pizza Fingers
Shape refrigerated pizza dough into narrow fingers, then press a small pepperoni piece into each tip as a nail. Add a little mozzarella down the center, keeping the cheese away from the edges so it doesn’t slide off during baking.
For better results, chill the shaped dough for a few minutes and press the toppings gently into the surface. Bake until the dough is golden and the cheese has melted. Serve these pizza fingers warm with marinara for dipping.
13. Crescent Roll Mummy Fingers
Wrap crescent dough around mozzarella sticks or cooked vegetables, leaving a small section exposed at the tip for the nail. Bake until the dough is puffed and golden, then add olive slices or thin pepper strips to the exposed ends.
Serve with marinara while the crescent fingers are still warm. Let the filling cool slightly before serving, especially when using mozzarella, because melted cheese can stay much hotter than the bread.
14. Cheesy Breadstick Severed Fingers
Bake cheese breadsticks until golden, then cut them into uneven lengths for a freshly severed look. Before baking, use a knife to press two or three shallow joint marks across each piece. Brush the sticks with garlic butter and finish with grated Parmesan.
Place a small pool of marinara at one end of the platter so each breadstick looks dipped in blood. These are easy to assemble ahead and serve warm, although their crisp edges also hold up well during a brief party spread.
Fresh, No-Bake, and Kid-Friendly Finger Snacks
Fresh snacks bring color and crunch to a Halloween table without turning on the oven. At my last Halloween party, the vegetable fingers disappeared before the baked treats because kids loved choosing their own nails, dips, and “blood” effects. These easy ideas work well for school parties, kids’ tables, and last-minute gatherings.
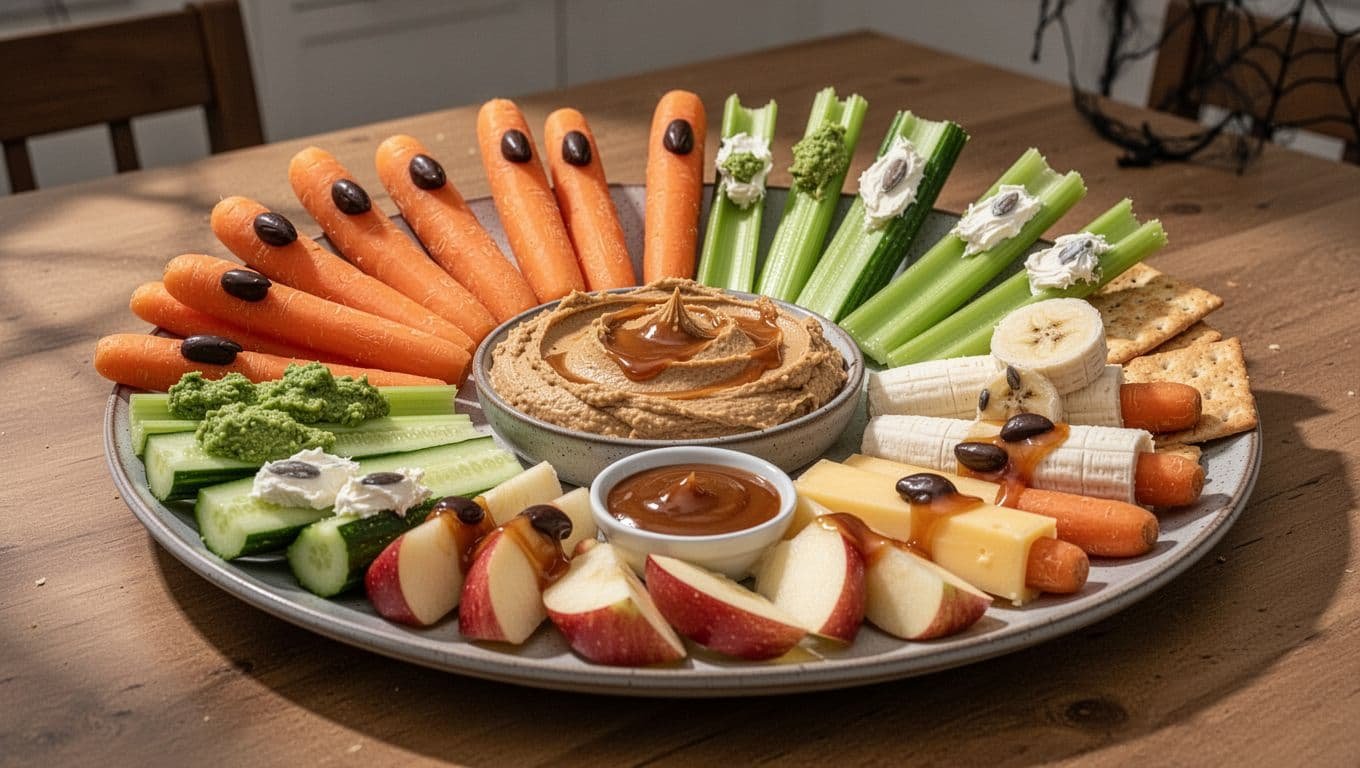
15. Carrot Fingers with Hummus
Use peeled baby carrots or cut large carrots into short, finger-length sticks. Arrange them around a bowl of hummus, then add almond slivers or pumpkin seeds as edible nails.
Cut a small slit across the tip of each carrot before inserting the nail. The slit holds the almond or seed in place and gives the carrot a more realistic fingertip. For a nut-free platter, use pumpkin seeds instead of almonds. Add thin lines near the center with a paring knife to suggest knuckles.
16. Sunflower Butter Carrot Fingers
Sunflower butter adds a creamy, nut-free twist to carrot witch fingers. Spread it over carrot sticks, or pipe a small amount into a shallow groove along the top. Then press in pumpkin seeds, coconut chips, or small olive pieces as nails.
This option works well for guests with common nut allergies, especially when you check the labels on the sunflower butter and other toppings. Keep the carrot pieces short and slightly uneven, since crooked fingers look more convincing than perfectly matched sticks.
17. Celery Witch Fingers with Green Dip
Cut celery stalks into finger lengths and fill the centers with guacamole, green goddess dip, or herbed cream cheese. The ridges along the celery already resemble finger joints, so this snack needs very little decorating.
Add a thin red pepper strip or olive slice to the end of each piece as a nail. Arrange the celery around extra dip, then chill the platter until serving. Guacamole creates a bright green witchy effect, while cream cheese gives the celery a milder flavor for younger children.
18. Cucumber Fingers with Cream Cheese Nails
Cut cucumbers into thick strips or halve small cucumbers lengthwise. Spread a little cream cheese on one end, then press a thin piece of red, yellow, or green pepper into it as the nail.
For wrinkle lines, lightly score the cucumber skin with a fork. Make two or three shallow marks near the ends without cutting all the way through. Serve these fingers chilled so they stay crisp. If children are helping, let them decorate the cucumber pieces after you’ve prepared the vegetables.
19. Banana Witch Fingers with Chocolate Nails
Cut bananas into short sections, then place sliced almonds, chocolate chips, or sunflower seeds at one end as nails. A small dab of sunflower butter can help hold larger toppings in place.
For a playful blood effect, drizzle a little melted red candy or strawberry sauce over the opposite end. Assemble these just before serving because bananas soften and brown quickly. Use sunflower seeds for a nut-free version, and choose chocolate chips when you want a sweeter dessert-style snack.
20. Apple Witch Fingers with Caramel Dip
Slice apples into thick wedges, then trim the corners slightly so each piece resembles a finger. Press sunflower seeds or candy nails into the narrow ends, and arrange the slices around a bowl of caramel dip.
To slow browning, toss the apples with a little lemon juice immediately after cutting. Pat them gently with a paper towel before arranging so the caramel clings better. For younger children, use soft toppings and cut the apple pieces into manageable sizes.
21. Cheese and Cracker Witch Fingers
Cut string cheese, mozzarella, or firm cheddar into short finger sections and pair them with crackers. Use a knife to add shallow joint marks, then press an olive slice or thin pepper piece into one end as a nail.
Serve the cheese fingers with tomato dip for a quick red “blood” effect. If you’re preparing the platter early, refrigerate the cheese and dip until serving. Keep cold snacks chilled during longer parties, and return leftovers to the refrigerator within two hours.
Creative Halloween Finger Foods for a Spooky Snack Board
The most memorable Halloween boards mix familiar snacks with creepy details. At my last Halloween party, guests kept returning to the platter because every finger food looked different, from flaky pastry twists to bright green jalapenos and golden sweet potato fingers. A few red dipping sauces made the whole board look like a witch’s pantry without requiring complicated recipes.
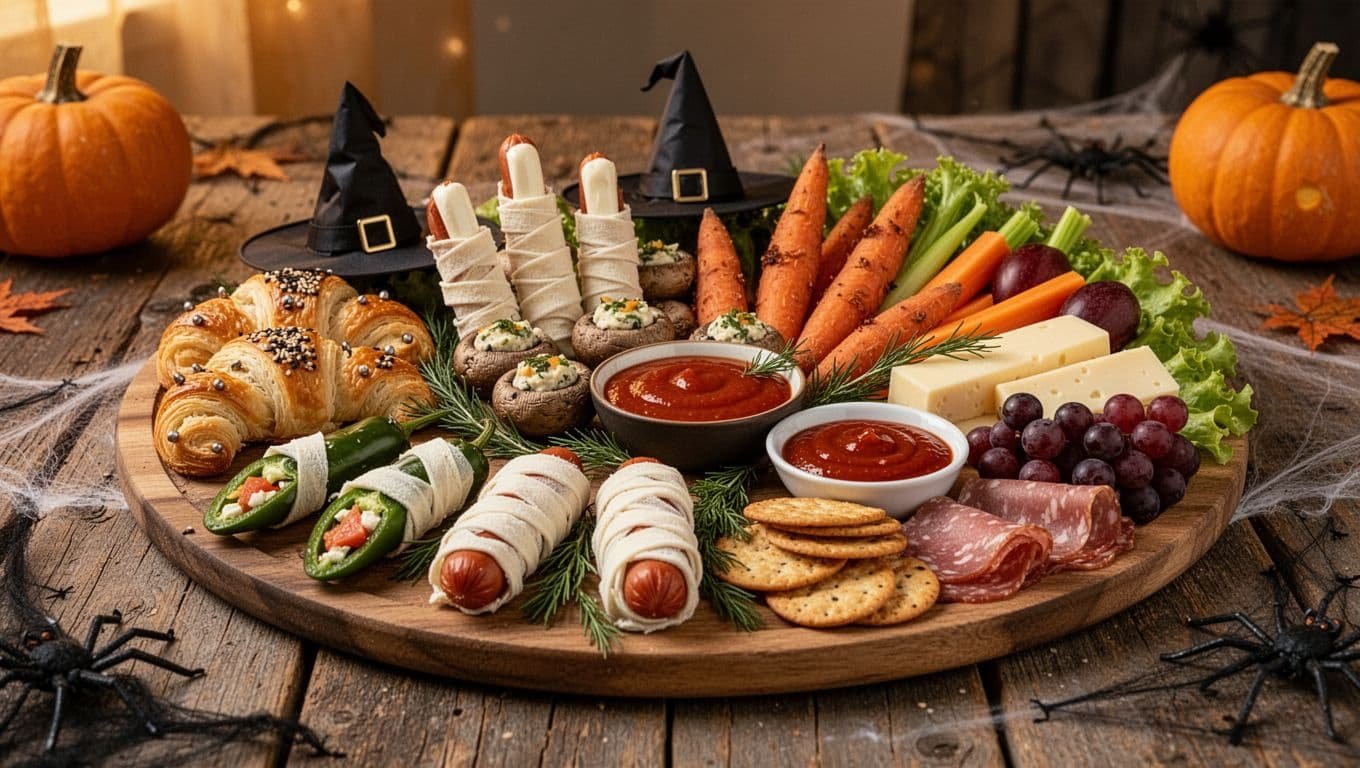
22. Puff Pastry Witch Finger Twists
Cut thawed puff pastry into narrow strips, then twist each strip gently before shaping it into a crooked finger. For a savory version, sprinkle the pastry with shredded cheese, Italian herbs, or garlic powder. Cinnamon sugar creates an easy sweet option that pairs well with berry sauce.
Press a pumpkin seed, sunflower seed, or small pepper piece into one end as the nail. Bake until puffed and golden, then serve the twists with marinara, red pepper jelly, or berry sauce. The flaky layers add a light, crisp texture beside softer foods on the board.
23. Mozzarella Stick Witch Fingers
Bake or air-fry frozen mozzarella sticks according to the package directions, then cut them into finger-sized pieces while they remain warm. Add an olive slice or narrow red pepper strip to each tip as a nail, pressing gently so it stays in place.
Let the cheese rest for a few minutes before arranging it. If you serve the sticks immediately, the hot filling may ooze out before guests can pick them up. Set them beside warm marinara for an easy red “blood” effect.
24. Stuffed Mushroom Finger Bites
Fill mushroom caps with cream cheese, breadcrumbs, herbs, or a favorite savory stuffing. After baking, add thin pepper or cheese strips to the rounded edges as edible nails. The caps create a short, plump finger shape that looks different from long pastry or vegetable fingers.
Arrange the mushrooms next to a small bowl of marinara or roasted red pepper sauce. Their tender texture works well beside crisp crackers, crunchy vegetables, and flaky pastry. Serve them warm, and keep cooked leftovers chilled when the party lasts more than a short serving period.
25. Sweet Potato Witch Fingers
Slice peeled sweet potatoes into long, uneven pieces that resemble fingers. Toss them with oil, salt, pepper, and smoked paprika, then roast until tender inside and browned around the edges.
Add a pumpkin seed or pepper nail after roasting, when the pieces are cool enough to handle. Serve the sweet potato fingers with spicy ketchup, garlic dip, or chipotle sauce. Their orange color brings a warm Halloween shade to a board filled with red, green, and pale ingredients.
26. Hot Dog Mummy Fingers
Cut hot dogs into short sections, then wrap each one with narrow strips of refrigerated crescent dough. Leave one tip exposed for a pepper or cheese nail. Bake until the dough is puffed and golden, then add tiny mustard eyes or a thin ketchup line.
Serve these warm with mustard and marinara. Since hot dogs are perishable once prepared, keep them at 140°F or above for extended service, or follow the USDA food safety basics and refrigerate them within two hours.
27. Stuffed Jalapeno Witch Fingers
Halve jalapenos lengthwise and remove the seeds and inner ribs for a milder snack. Fill them with cream cheese and shredded cheddar, then add a thin pepper strip or almond sliver as the nail before baking.
The green peppers look naturally witchy, while a cool ranch dip balances their heat. If children or spice-sensitive guests will eat them, remove all seeds and use small sweet peppers for a gentler version.
28. Halloween Finger Food Charcuterie Board
Build the board around the prepared finger foods, then fill open spaces with sliced vegetables, cheese, crackers, fruit, lettuce, and herbs. Place similar items in small clusters, such as mozzarella fingers beside marinara and sweet potato fingers near garlic dip.
Store-bought crackers, frozen mozzarella sticks, refrigerated crescent dough, and prepared dips make the platter faster to assemble. Use lettuce leaves, rosemary sprigs, or candy corn to fill gaps without adding more recipes. Keep the finger shapes visible, then scatter sauces around them for a full board with plenty of color and texture.
Simple Ways to Make Witch Fingers Safer, Tastier, and Easier
At my last Halloween party, the witch finger platter disappeared faster than the carefully decorated desserts. Guests loved choosing between cheesy pizza fingers, crisp potato bites, and sweet treats with different edible nails. These shortcut ideas also make it easier to serve guests with vegan, gluten-free, or dairy-free needs.
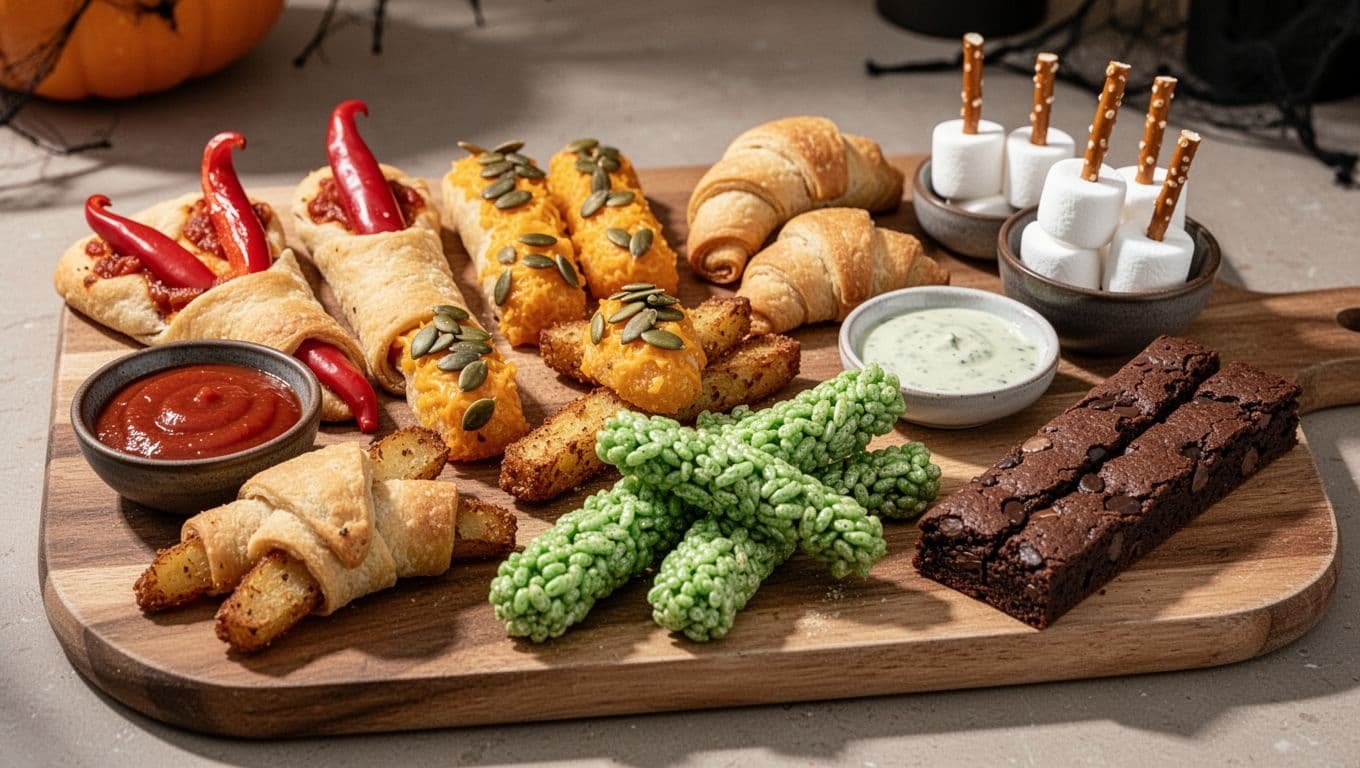
29. Vegan Pizza Witch Fingers
Roll vegan pizza dough into short, crooked fingers, then brush them with plant-based butter mixed with garlic. Sprinkle on vegan cheese and press a thin sweet pepper strip into each tip as a nail. Bake until golden, serve with marinara, and reheat briefly before guests arrive.
30. Gluten-Free Cheddar Finger Bites
Mix gluten-free flour, cornmeal, shredded cheddar, herbs, and an egg into a firm savory dough. Shape it into short fingers, score the knuckles, and press pepitas or olive slices into the tips. Bake until firm and lightly golden, then cool slightly before transferring them to the platter.
31. Dairy-Free Crescent Finger Snacks
Wrap dairy-free crescent dough around thin vegetable strips or pieces of plant-based sausage. Leave one end exposed, then add a sliced pepper nail before baking until puffed and golden. Serve these warm with dairy-free ranch or tomato dip for a party snack that welcomes more guests.
32. Air Fryer Potato Witch Fingers
Season mashed potatoes or prepared potato dough, then shape the mixture into small fingers and press seeds into the ends as nails. Air fry until crisp and browned, turning if needed. Work in small batches so the fingers brown evenly and don’t stick together.
33. Rice Cereal Witch Fingers
Tint a crispy rice cereal mixture green, then shape it into short, manageable fingers while it’s still slightly warm. Add candy pieces, chocolate chips, or seeds as nails, and let the shapes set completely. Place them on the dessert board only after they firm up.
34. Marshmallow Witch Finger Pops
Slide marshmallows onto pretzel rods, coat them with green candy melts, and add sliced almonds or candy pieces as nails. Children can help decorate once the coating cools slightly. Finish the tips with red icing for a playful blood effect, then let the pops set before serving.
35. Brownie Witch Finger Bars
Bake brownies in a shallow pan, cool them completely, and cut them into narrow finger-shaped bars. Spread on green frosting, add sliced almond nails, and pipe red gel at the tips. This shortcut creates the witch finger look without the time-consuming step of shaping cookie dough.
For the safest party setup, bring out smaller batches instead of placing every perishable snack on the table at once. Keep hot foods at 140°F or above, cold foods at 40°F or below, and follow USDA leftovers guidance for food left at room temperature.
How to Serve and Prepare Halloween Witch Finger Foods
Witch finger foods look impressive when you add small details, but the process stays simple. At my last Halloween party, guests gathered around the platter before they touched the desserts because the crooked shapes, red sauces, and different edible nails made every snack look slightly different.
The best approach is to prepare the shapes ahead, add delicate decorations at the right time, and serve sweet and savory foods in separate areas. That keeps the platter attractive while making it easier for guests to find snacks that fit their diets.
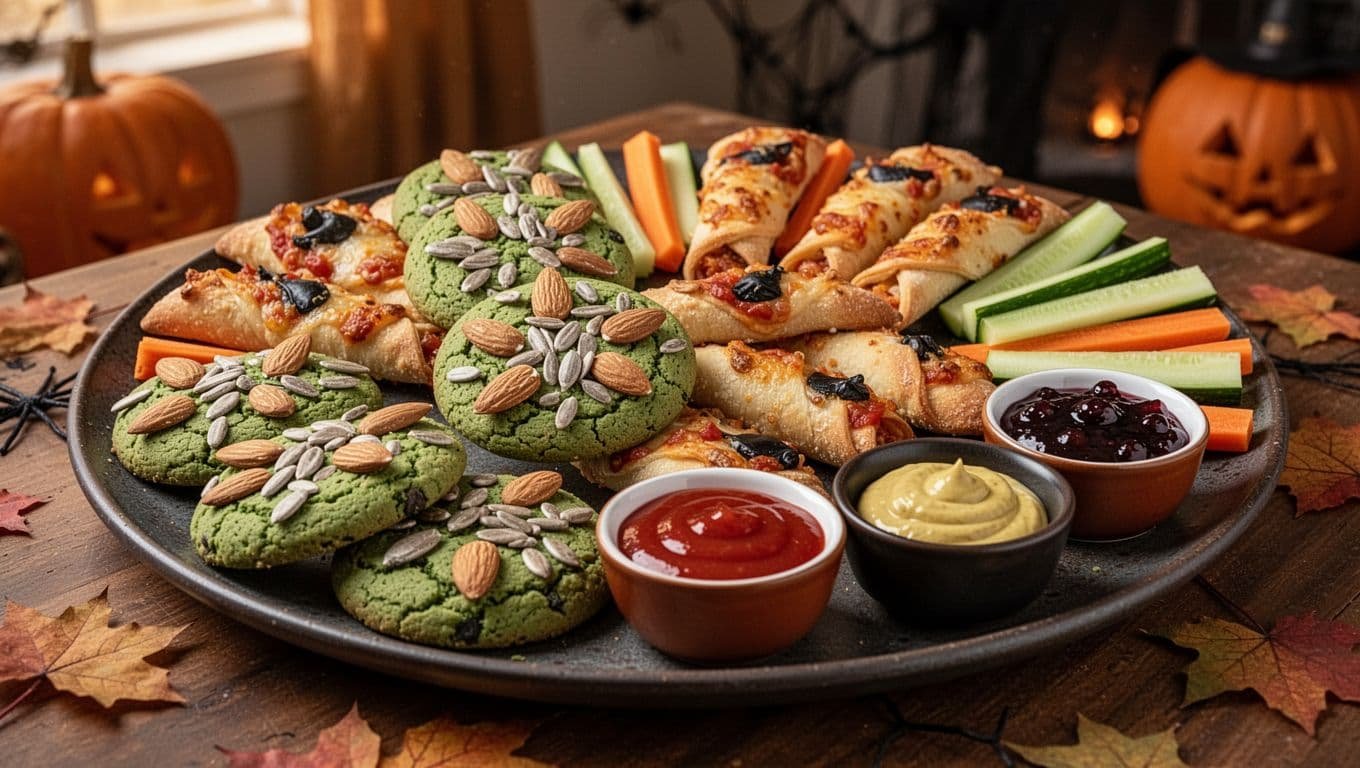
Shape the Fingers and Add Edible Nails
Keep each piece slightly uneven. Realistic witch fingers look better when they vary in length and bend gently instead of matching like uniform breadsticks.
Use a small paring knife or a toothpick to press two or three shallow lines across each knuckle. A knife creates clean wrinkles, while a toothpick makes thinner, rougher marks. Avoid cutting all the way through the dough, vegetables, or pastry.
Choose the nail according to the recipe and your guests’ dietary needs:
- Almond pieces create pale, pointed nails for cookies and pastries.
- Pepitas or pumpkin seeds offer a nut-free option with a greenish color.
- Thin pepper or olive pieces work well on savory foods.
- Coconut flakes add a light nail for sweet treats.
- Sunflower seeds are useful when you need a nut-free topping.
For dough-based foods, press the nail into the tip before baking when the topping can handle the heat. Add fragile decorations after cooking instead. Once the food cools, attach a nail with a small dab of frosting, cream cheese, sunflower butter, melted chocolate, or icing.
Add the dramatic details after cooking whenever possible. Spoon raspberry jam or strawberry gel onto sweet fingers, then use ketchup, marinara, or mustard on savory versions. These sauces stay brighter and cleaner when you apply them after baking, roasting, or air frying.
Prepare Ahead and Store Everything Safely
Make-ahead planning saves time on Halloween. When the recipe allows, shape cookie dough several days ahead, wrap it tightly, and refrigerate it until you’re ready to bake. Chilled dough also holds knuckle marks and crooked shapes better.
Store finished cookies in an airtight container once they have cooled completely. Keep meat, cheese, cut vegetables, filled pastries, and sauce-based snacks refrigerated until close to serving time. You can also prepare dipping sauces a day ahead and transfer them to small covered containers.
Cook hot foods fully, especially sausage, hot dogs, stuffed peppers, and meat-filled pastries. If you broil cheese or pastry fingers for extra color, stay nearby because the toppings can brown quickly. Perishable foods should not remain at room temperature for long periods. The CDC’s food safety guidance places the food safety danger zone between 40°F and 140°F and recommends discarding perishables left out for more than two hours, or one hour in temperatures above 90°F.
Build a Simple Halloween Serving Plan
Create one sweet section with cookies, brownie fingers, cereal treats, and fruit. On the other side, arrange pizza fingers, pretzels, vegetables, cheese, and savory pastries. Keep allergy-friendly items on their own tray with separate serving utensils to reduce accidental contact.
Place small bowls of marinara, ketchup, mustard, berry jam, and caramel between the groups. Labeling the sauces can help guests, but the platter should still look decorative and uncluttered.
Set out smaller batches and refill them as needed. That keeps the food fresher, protects delicate decorations, and lets your witch finger platter stay creepy instead of becoming crowded.
Frequently Asked Questions
At my last Halloween party, the witch finger foods became an instant conversation starter. Guests compared the almond nails, guessed which fingers were sweet or savory, and kept coming back for the snacks with the brightest red dipping sauces. These answers cover the practical details that help your platter look spooky, stay fresh, and work for a range of guests.
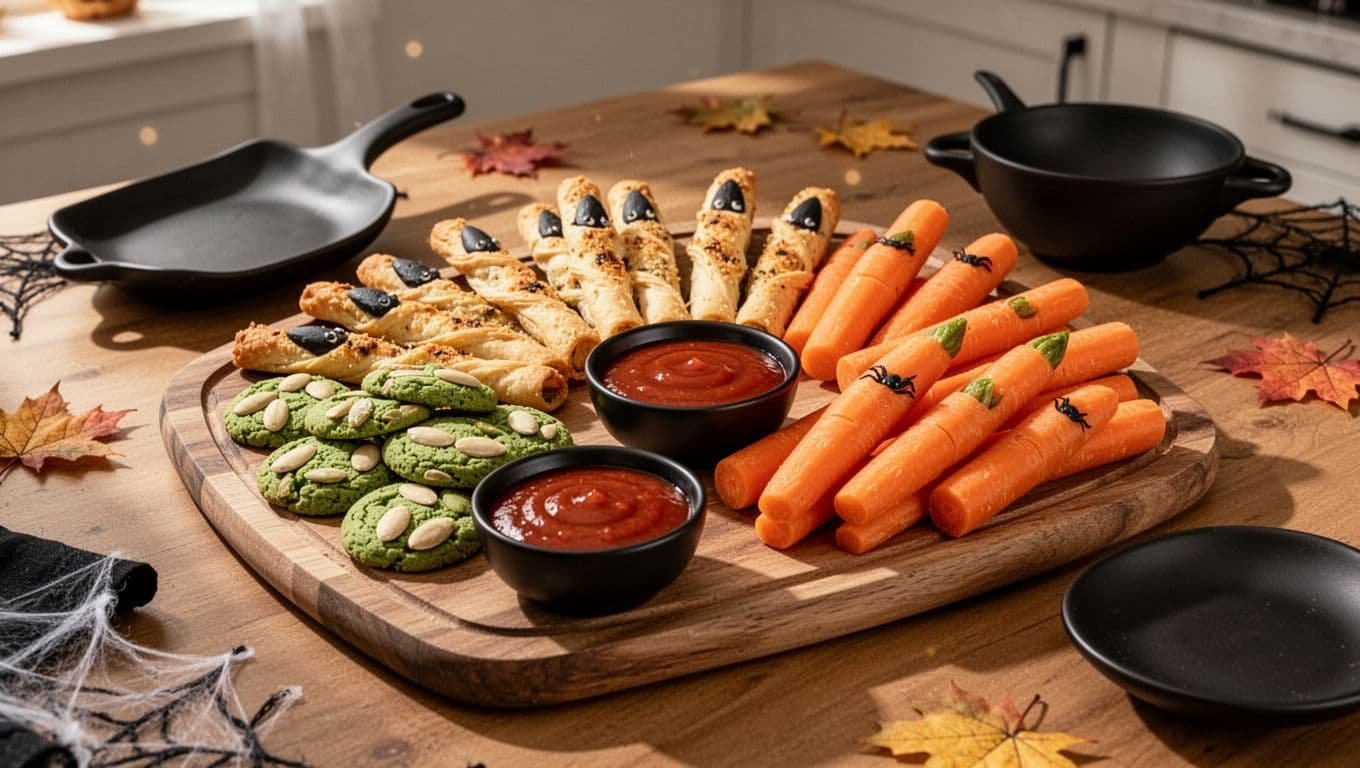
Can I make witch finger cookies ahead of time?
Yes, you can prepare the dough up to two days ahead and keep it tightly wrapped in the refrigerator. For longer storage, shape the fingers, place them on a parchment-lined tray, and freeze them until firm before transferring them to a freezer bag.
Bake the frozen fingers directly from the freezer, adding a few extra minutes if needed. Let them cool completely before decorating so the jam, icing, or candy nails stay neat.
What can I use instead of almonds for the fingernails?
Pepitas, sunflower seeds, sliced olives, thin pepper strips, coconut flakes, and red glacé cherry pieces all work well. Choose a topping that matches the recipe, since savory foods usually pair better with peppers or olives, while cookies suit seeds, coconut, or cherries.
For guests with nut allergies, check every ingredient label, including extracts, candy coatings, and prepared dough. Keep nut-free fingers on a separate tray with clean serving utensils to reduce accidental contact.
How do I stop witch finger cookies from spreading?
Keep the shaped dough cold before it goes into the oven. Chilling the fingers for 20 to 30 minutes helps the dough hold its crooked shape and keeps the knuckle marks visible.
Avoid making the fingers too thick or placing them too close together on the baking sheet. If the first batch spreads, chill the remaining dough longer and use a cool baking sheet instead of placing fresh shapes on a warm one.
How many witch finger foods should I make for a party?
For a dessert table, plan on two or three pieces per guest if other sweets are available. A batch that makes about 40 to 45 cookies works well for a medium gathering, especially when you serve other snacks beside them.
For a meal-style appetizer spread, prepare four to six savory pieces per person. Mix several types rather than making one large batch, since variety makes the platter look fuller and gives guests more choices.
How do I transport witch finger cookies without breaking them?
Let decorated cookies set completely before packing them. Arrange them in a single layer inside a flat, airtight container, or separate multiple layers with parchment paper.
Avoid placing heavy foods on top of the container during transport. If the cookies have soft jam or icing, carry the decorations separately and finish them after you arrive.
When should I add the blood effect and edible nails?
Add sturdy nails, such as almonds or pepitas, before baking when the recipe allows them to press securely into the dough. Fragile toppings, melted chocolate, icing, and red gel usually look better when added after the food cools.
For the cleanest presentation, decorate the cookies earlier in the day, then let the details set before arranging the platter. Add marinara, ketchup, jam, or berry sauce shortly before serving so the fingers don’t become soggy.
Conclusion
The best Halloween witch finger foods don’t need perfect shapes. Crooked fingers, uneven nails, and extra red sauce make the platter more playful and fun. Choose a mix of sweet cookies, savory bites, fresh vegetables, and one or two allergy-aware options so every guest has something to enjoy.
Prepare make-ahead items first, then add jam, sauces, icing, and delicate toppings close to serving time. Children can also help with safe decorations, such as seeds, candy pieces, or vegetable nails. Once everything is arranged, set out the platter and watch guests discover their favorite spooky snack. Sometimes the messiest-looking fingers are the first ones to disappear.
Save the pin for later


I’m the creator of My Everyday Dish, a food blog focused on easy homemade recipes, comforting family meals, simple baking, and seasonal food ideas. I love finding practical ways to make everyday cooking less stressful and more enjoyable. Here, I share recipes with simple ingredients, clear instructions, and plenty of flavor, helping you make delicious meals and treats you’ll feel confident serving at home.
Leave a Reply